
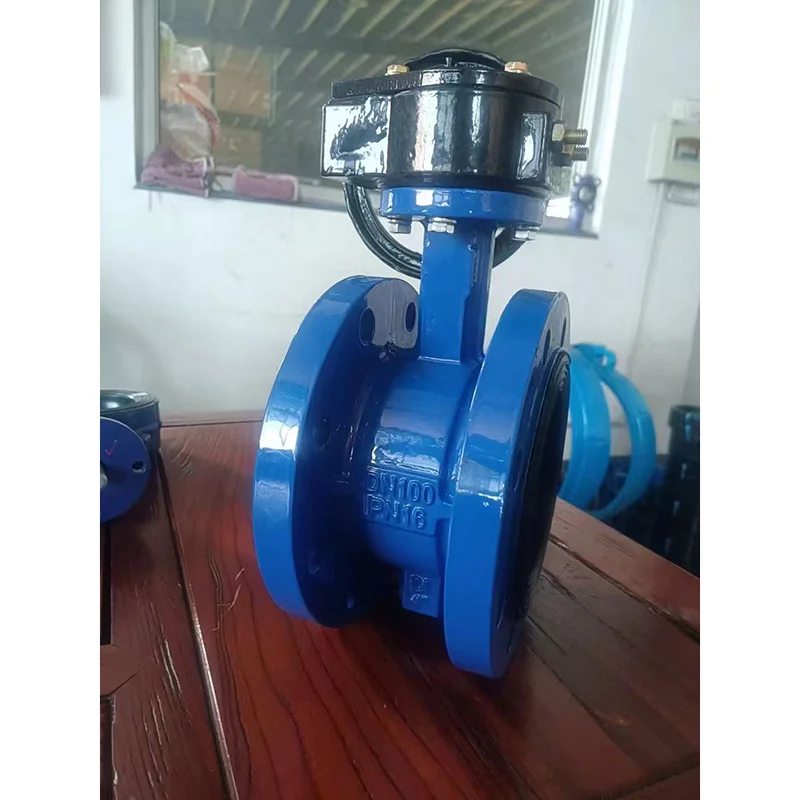
How to change the component of Soft Seal Butterfly Valve
2025-06-12
Changing the components of a soft seal butterfly valve involves several steps. Here's a general guide on how to do it:
1. Preparation
Safety First: Always wear appropriate personal protective equipment (PPE), such as gloves, safety glasses, and boots.
Isolate the Valve: Ensure the system is depressurized and drained of any fluids. Lockout/tagout procedures should be followed if necessary.
Tools Needed: Wrenches, screwdrivers, torque wrench, lubricant, gloves, and a replacement gasket or O-ring if required.
2. Disassembly of the Valve
Remove the Valve from the Pipeline: Loosen the bolts and remove the valve from the pipeline. This may require loosening the flange bolts or any mounting hardware depending on the valve's installation.
Remove the Actuator: If the valve has an actuator, detach it by unscrewing the actuator bolts from the valve body.
Open the Valve: If it's not already in the open position, gently rotate the valve disc to the fully open position.
3. Replace the Seal
Remove the Old Seal: Soft seal butterfly valves typically use rubber or elastomeric seals. Carefully remove the old seal from the valve body. Be cautious not to damage the sealing surfaces.
Clean the Seal Area: Clean the sealing surfaces inside the valve body to remove any debris, old gasket material, or dirt. Use a clean, dry cloth and, if needed, mild solvent.
Install the New Seal: Place the new soft seal (rubber, EPDM, or other material) into the sealing groove. Ensure it is seated correctly and securely in place. For a soft-seal valve, it is critical to ensure a tight fit.
4. Check and Replace Other Components (If Necessary)
Check Disc Condition: Inspect the valve disc for any damage or wear. If it's damaged, replace it with a new one.
Examine Shaft and Bearings: Check the valve shaft and bearings for wear or corrosion. If the shaft is damaged, it may need to be replaced.
O-Rings and Gaskets: Inspect the O-rings and gaskets in the valve body and actuator. Replace any that appear damaged or worn.
5. Reassembly
Reassemble the Valve: Once the seals and other components have been replaced, reassemble the valve by carefully aligning the valve disc and actuator. Tighten the actuator bolts securely.
Reattach the Valve to the Pipeline: Place the valve back into the pipeline and align the flanges. Tighten the flange bolts evenly using a torque wrench to avoid misalignment.
6. Testing
Test the Valve Function: Before putting the valve back into service, perform a functional test to check that it opens and closes smoothly. Ensure there are no leaks.
Leak Testing: Pressurize the system and inspect for any signs of leakage around the valve body or the soft seal.
Adjust the Actuator (if applicable): If the valve is actuated, check the actuator alignment and adjust the position if necessary.
7. Final Check
Final Inspection: Double-check all bolts and seals for tightness and proper alignment. Verify that the valve is operating correctly and no leaks are present.
Common Components to Replace:
Soft Seals: Often made from elastomeric materials (EPDM, NBR, etc.), these seals ensure a tight shutoff.
Valve Disc: The part that rotates to control flow.
Shaft and Bearings: Ensure the disc rotates smoothly.
O-rings and Gaskets: Ensure proper sealing between the valve body and flanges or actuator.