A Guide to Replacing HTN Segment Varitronix LCD Modules
2025-03-13
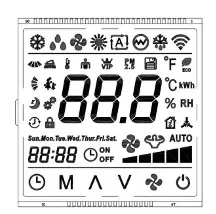
Segment LCD displays are widely used in industrial, automotive, and consumer electronics applications due to their low power consumption and high visibility. Among the leading manufacturers of these displays is Varitronix, a company known for its high-quality HTN (High Twisted Nematic) segment LCD modules. However, over time, these displays may degrade, requiring a replacement to ensure continued performance.
This blog provides a step-by-step guide to replacing an HTN Segment Varitronix LCD Module, including key considerations, necessary tools, and best practices.
Understanding HTN Segment LCD Technology
HTN (High Twisted Nematic) is a type of LCD technology that offers better contrast and viewing angles than standard TN (Twisted Nematic) displays. HTN segment displays are commonly used in:
- Industrial equipment
- Medical devices
- Home appliances
- Automotive dashboards
These displays are favored for their low power consumption, wide operating temperature range, and customizable segment layouts for different applications.
When Should You Replace an HTN Segment Varitronix LCD Module?
Several signs indicate that it is time to replace an LCD module:
- Faded or dim segments – The display loses contrast and becomes difficult to read.
- Missing or incomplete segments – Some numbers or symbols fail to appear correctly.
- Response delay – The display takes longer to update information.
- Physical damage – Cracks or scratches on the display affect readability.
If your device exhibits any of these issues, replacing the LCD module is the best way to restore functionality.
Step-by-Step Guide to Replacing an HTN Segment LCD Module
1. Identify the Correct Replacement Module
Before removing the old module, check the model number and specifications of your current Varitronix LCD display. Ensure the replacement module matches the size, pin configuration, and voltage requirements of the original unit.
2. Gather the Necessary Tools
You will need the following tools to replace the module safely:
- Anti-static gloves (to prevent electrostatic discharge)
- Precision screwdriver set
- Soldering iron (if required for the connection)
- Multimeter (to check electrical connections)
- Adhesive or mounting brackets (if needed for installation)
3. Power Down and Disassemble the Device
- Turn off the device and disconnect any power sources.
- Carefully disassemble the casing to access the LCD module.
- Locate the ribbon cable or pin connector that attaches the LCD to the circuit board.
4. Remove the Old LCD Module
- If the module is attached with a connector, gently unplug it.
- If the module is soldered onto the board, use a soldering iron to remove it carefully.
- Take note of the alignment and positioning to ensure proper installation of the new module.
5. Install the New LCD Module
- Align the new Varitronix HTN segment LCD module with the connector or solder points.
- If using a pin connector, insert it firmly but gently.
- If soldering, ensure all connections are clean and secure to avoid display malfunctions.
Replacing an HTN Segment Varitronix LCD Module is a straightforward process when done carefully. By ensuring compatibility, following the correct installation steps, and testing the display before reassembly, you can restore your device’s functionality efficiently.


